
Building a Duck Coop for (Basically) Free
Over the last few years we have sought to grow, hunt and forage as much of our diet as possible. While greens, deer meat, small game, root crops, mushrooms, herbs, and other vegetables are abundant, we do not source fats locally. Fat is one of the most difficult things to provide for ourselves! We also purchase or barter for a lot of eggs.
In the time of Covid where much of the world is shutting down, eggs are rationed and food shortages are a real potential, 2020 seemed like the perfect year to up our local meat and egg production. To this end, we are raising meat birds for the first time this year! Our neighbor ordered some Cornish Crosses and we bought some just-hatched chicks from her. They are nearly 5 weeks old at this point and as they are bred for quick meat, they only live until they are 7-8 weeks. This is the most popular breed in the US for meat and if you buy supermarket chicken it is likely this breed.
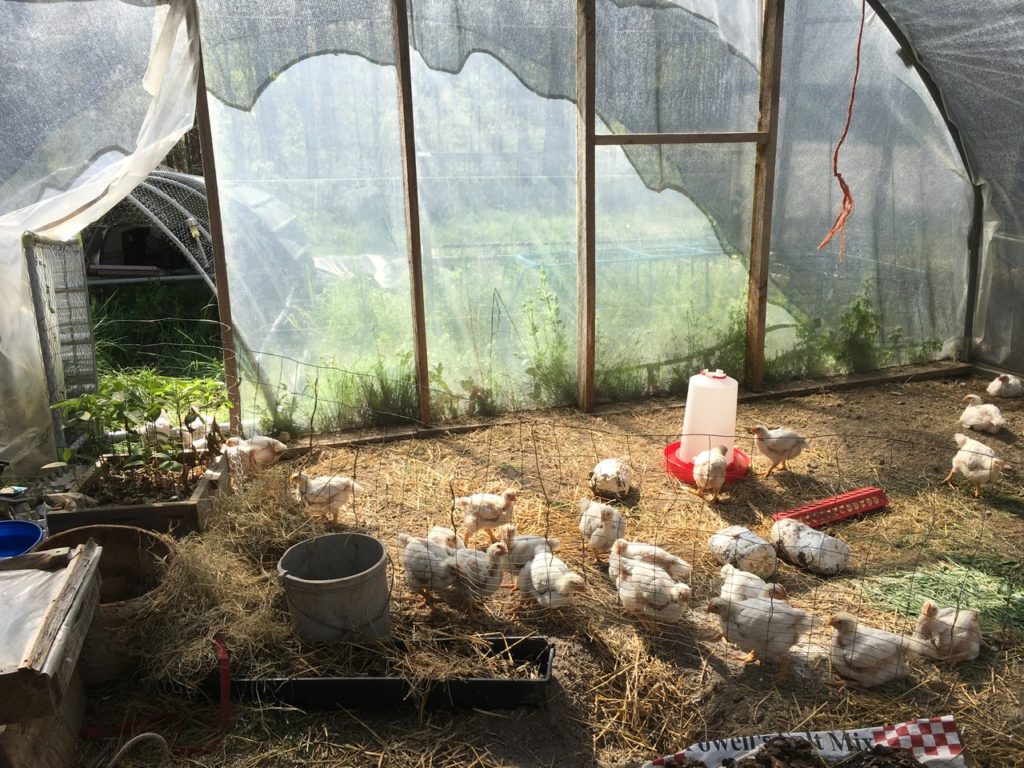
It’s been strange raising something that is bred not for vigor or for the quality of its foraging qualities, but simply for meat. I’ll write more about this process in another article. In addition to the meat birds, we are also getting Muscovy ducks this year! Muscovies are a great homestead breed that provides both meat and eggs and are known as great foragers and mothers. They also hunt mosquitoes and will take care of garden pests. We will be picking up around 20 of them hopefully next week. In preparation for their arrival, we built a coop!
Building the Duck Coop
There are many ways to build a duck coop! Our aim was to build something with as many materials that we had on hand as possible. We made a couple trips to the local recycling center as well and found some goodies. Because of this, the coop was essentially built for free! Minus screws, nails and pine 2 x 4s from a local mill, everything was repurposed. Here are the following materials we integrated into the coop that we salvaged: 4 windows, a cute yellow door with glass window, metal roofing and gutters, cedar mill ends we had from previous projects, metal diamond lath, local bamboo from nearby creeks (we did wattle and daub on it with local clay plaster), metal roof pieces that are buried underground at the base of the walls to protect against critters, and more.
It turned out great! Very functional and cute in a hodgepodge way that we like around here. We still have a few finishing touches, but the coop is mostly finished.
Here’s how we did it!
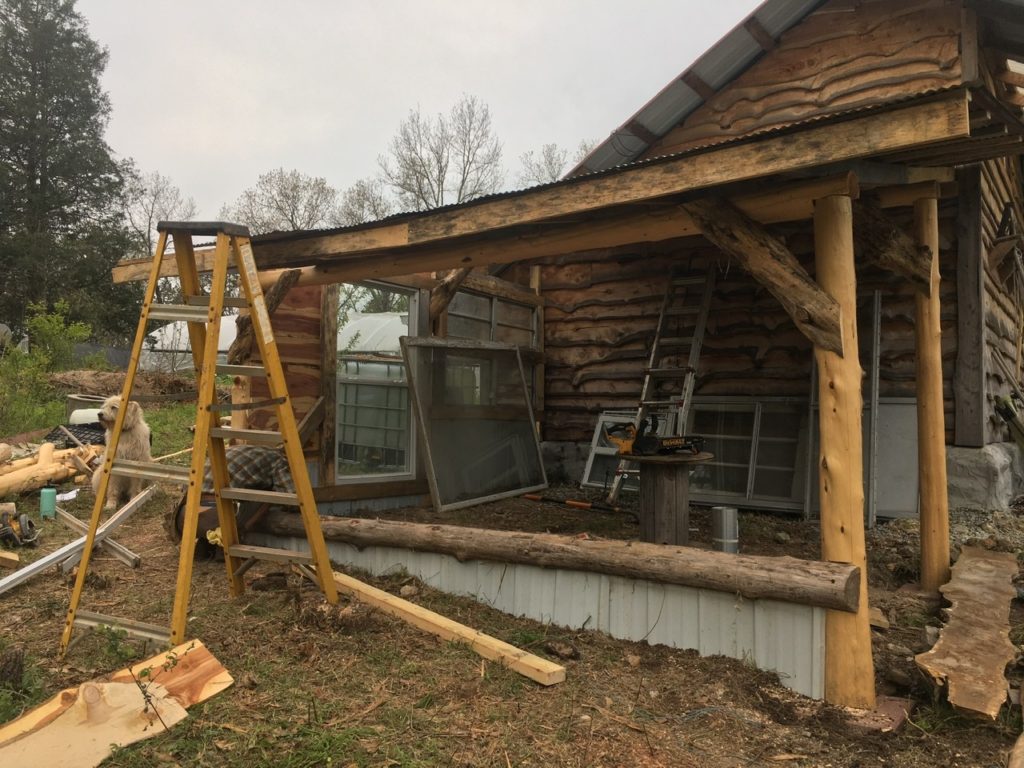
Round Wood Framing
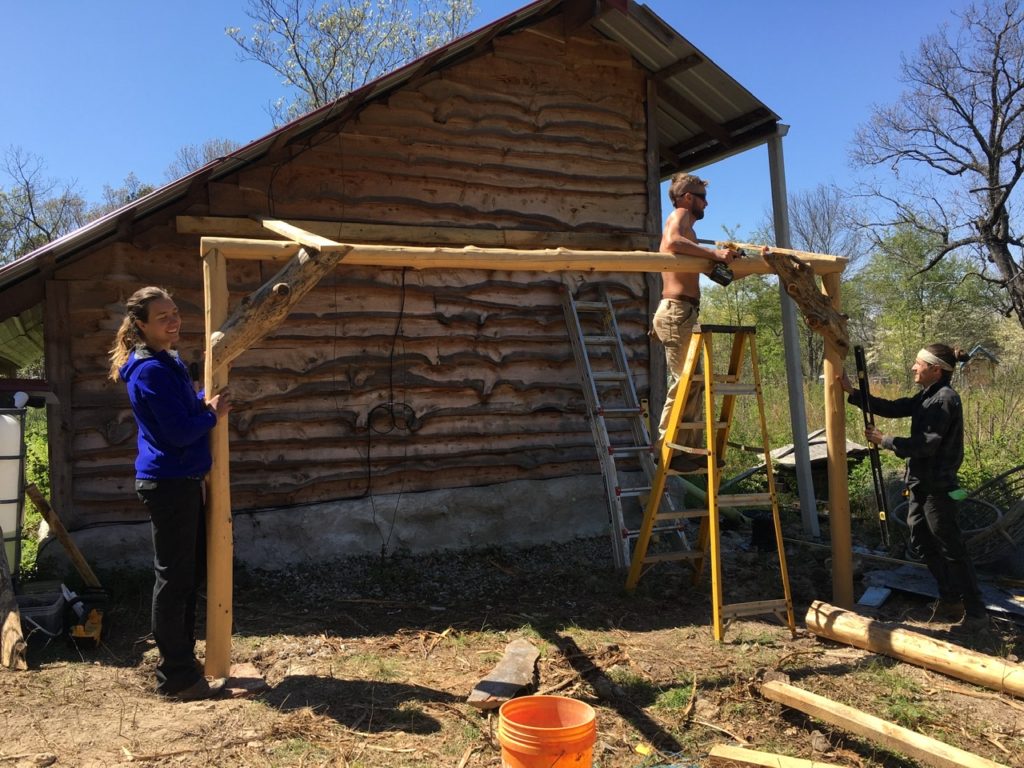
We decided to build off the back of the solar shed, extending a roof off of the eastern wall. The width was chosen to match the solar shed and the length was determined by the available roofing. It turned out to be about 12 feet by 12 feet. That gives of plenty of room to grow into for future poultry housing. After laying out the rough outline in place, we felled and peeled a few Eastern red cedars (actually Juniperus virginiana) to use as posts and beams to support the roof. When cut while actively growing, the bark peels quite easily- somewhat like a sticky banana. Using a scrench (the screwdriver wrench combo used for chainsaws) to get under the bark, we stripped the bark from the trees to avoid burrowing insects and to make the wood last longer.
Roof & Rafters
We first attached a 2×4 ledger board directly through the siding to the studs of the solar shed so we could support the rafters. To support the 4 posts that would carry the rest of the roof load, we dug holes and backfilled with gravel and packed it tight. We laid a concrete paver over this and leveled it. This is to keep the cedar off the ground. I used a chainsaw to flatten the top of the beams so they would fit snuggly on top of the posts and used long lag screws to attach them. Using slabs of cedar left over from milling, I screwed in the diagonal knee braces. Then the assembly went up!
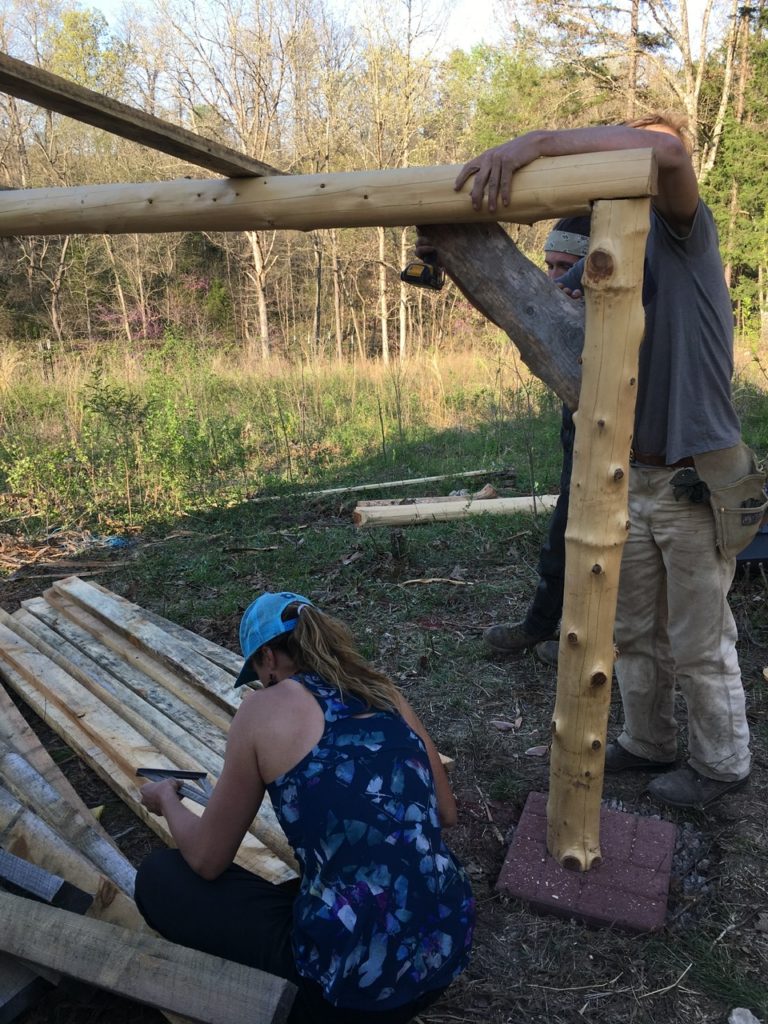
Once we had the two post and beam assemblies ready, we got them into position and roughly plumb. Using round wood with curves and sweeps make plumbing difficult, but we kept reminding ourselves that “it’s just a duck coop”. Once up, we screwed in 2×4 rafters running from the ledger board to the first post and beam assembly. Another set of rafters continued to the second assembly. Over this we laid 1×4 purlins running perpendicular to attach the roof to. Re-using corrugated roofing meant I had to consider hole placement carefully. We laid out purlins at 24” to match original holes. As one side was very rusty, we flipped it over and screwed it in through the original holes. The downside of this is that what was a peak, was now a valley so I had to add silicone to each penetration. This was a little extra work but worth the insurance of a dry coop.

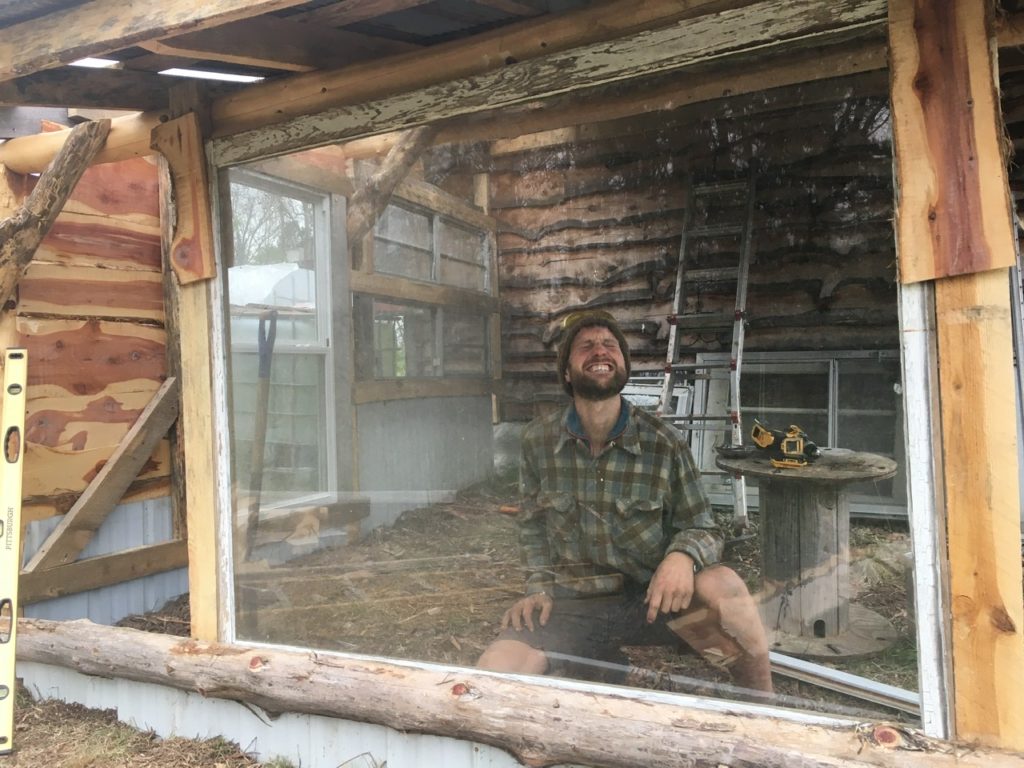
Window Walls
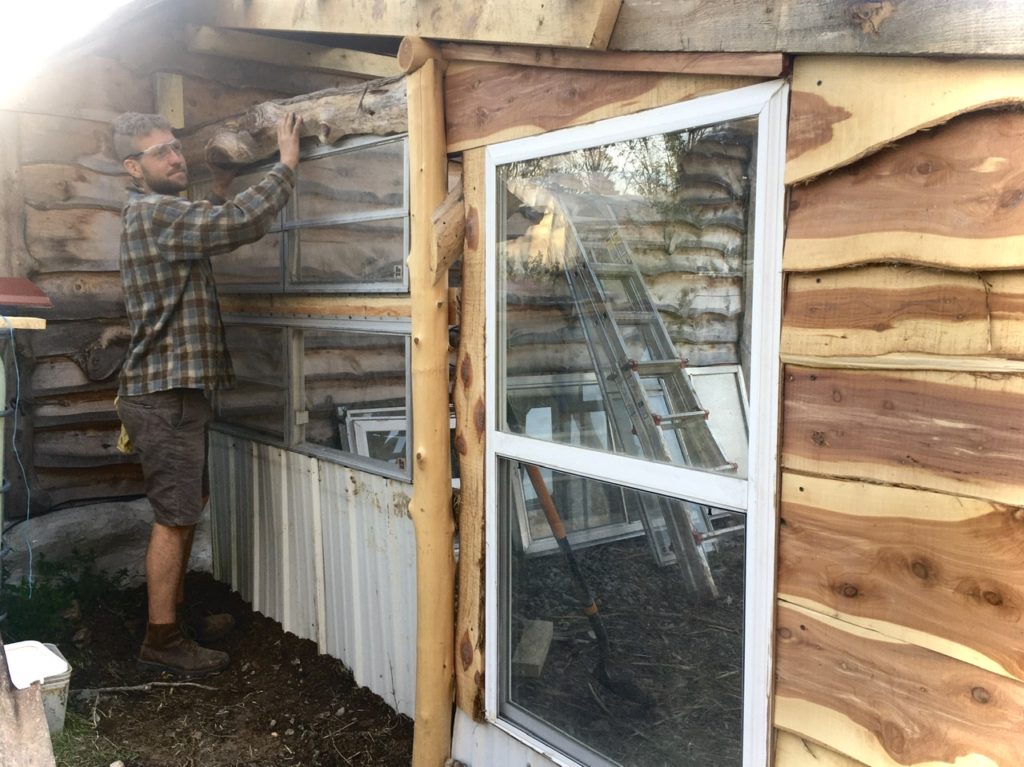
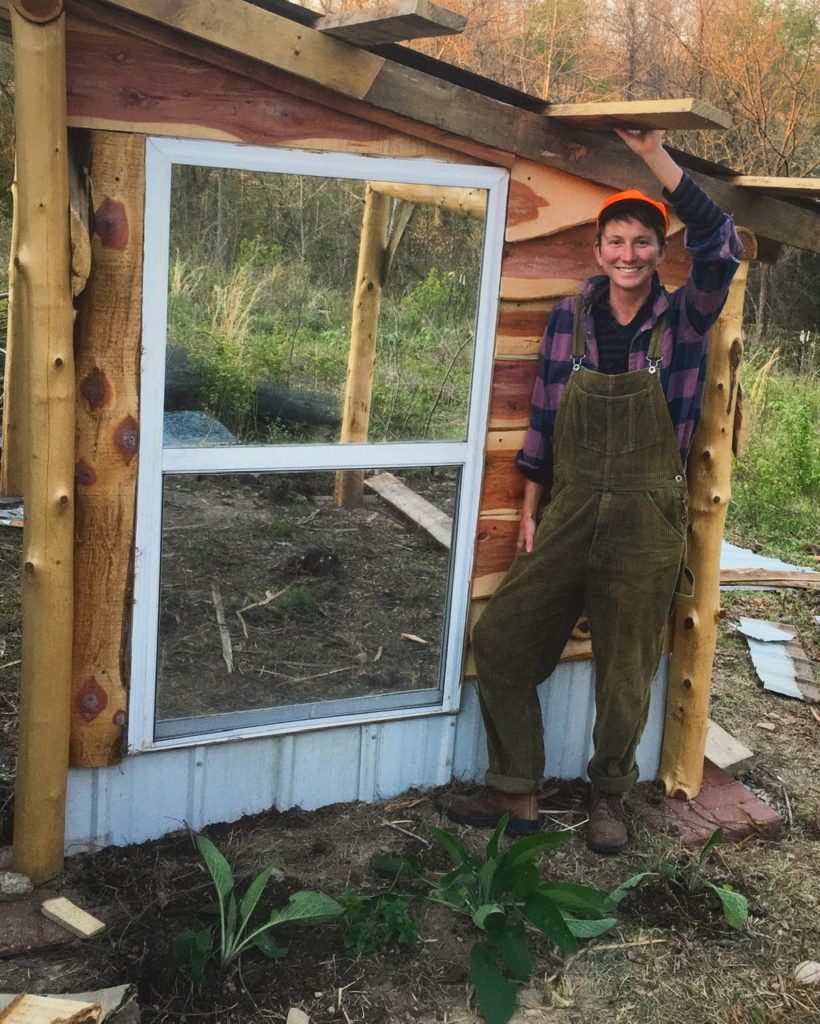
After the roof was up, we had fun filling in the walls. Using salvaged windows meant that the walls went up fast! It took a little creativity to frame out the windows, but we got it done. We wanted plenty of light and good airflow. One bonus of ducks over chickens is that they are more cold tolerant, so we could get away with building a looser building with plenty of airflow. The southern wall is nearly all windows, and since they can all open we have good ventilation options. The bottom foot or so is metal roofing from the recycling center that we buried to deter burrowing creatures from getting at out duckies.
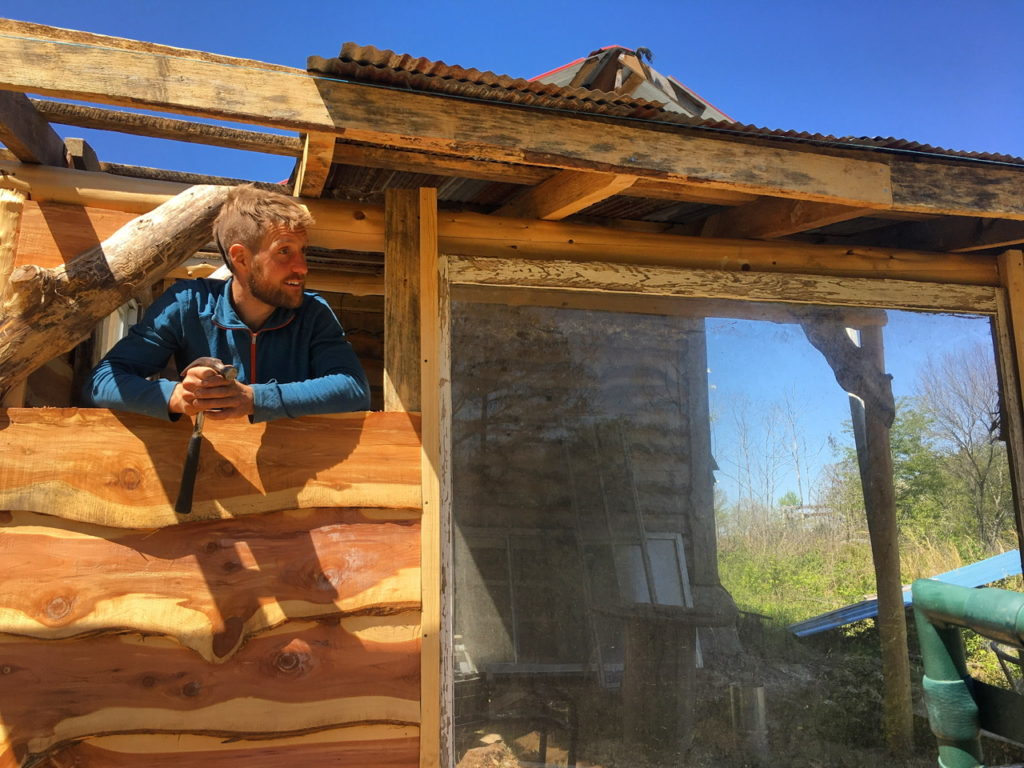
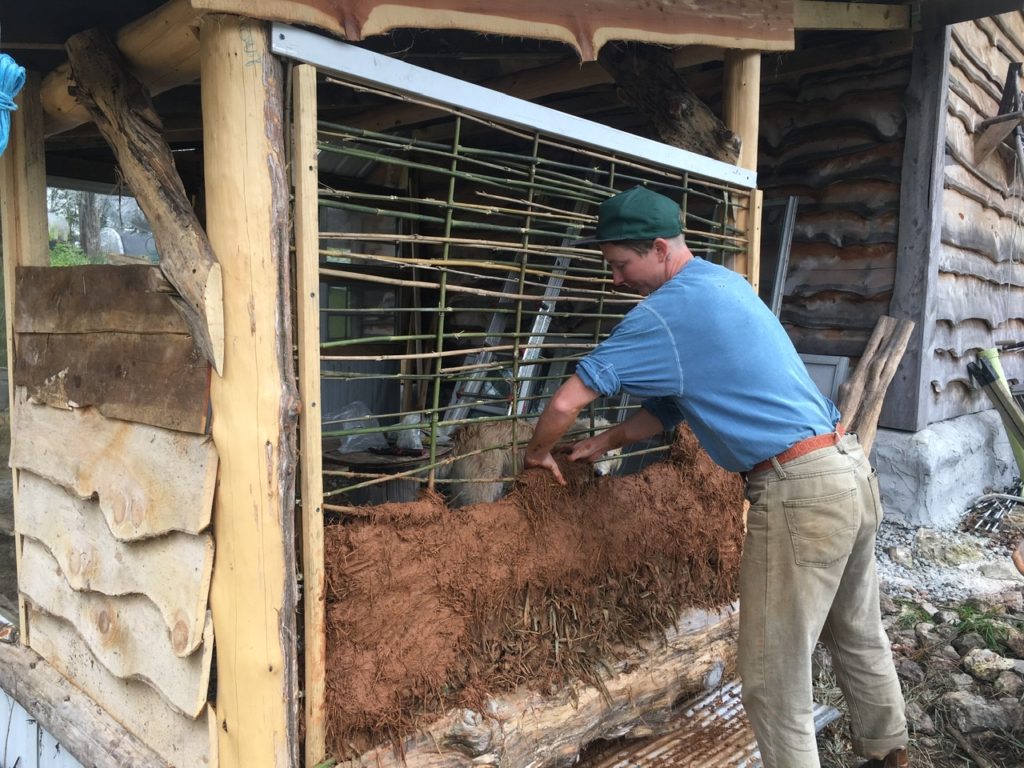
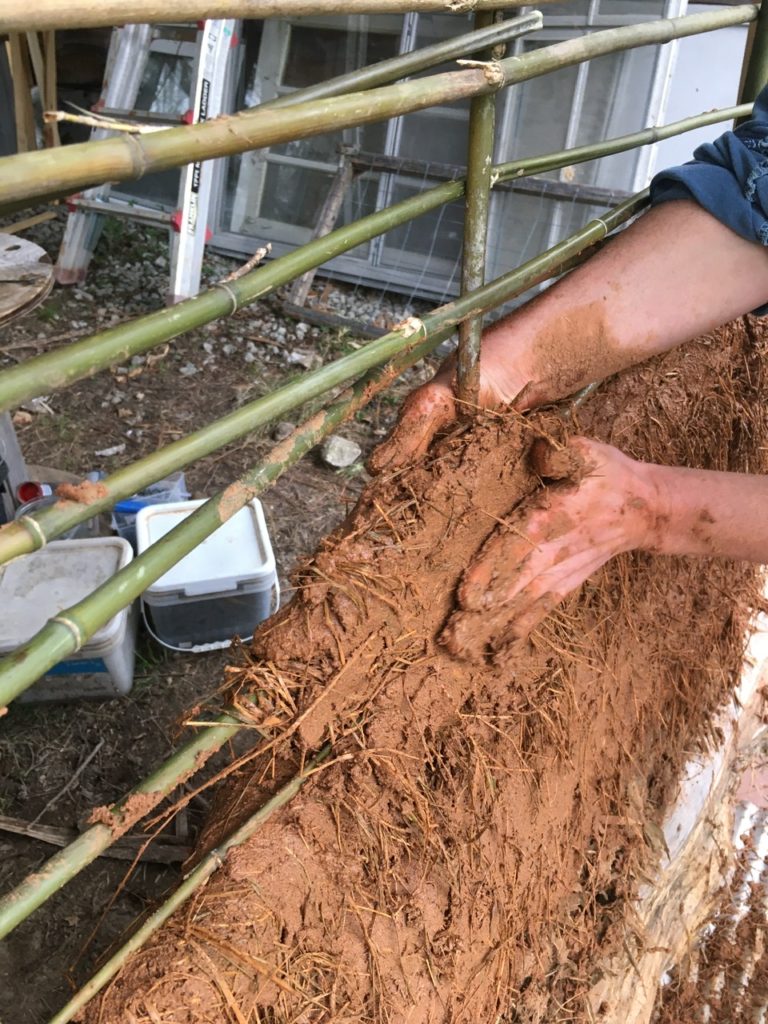
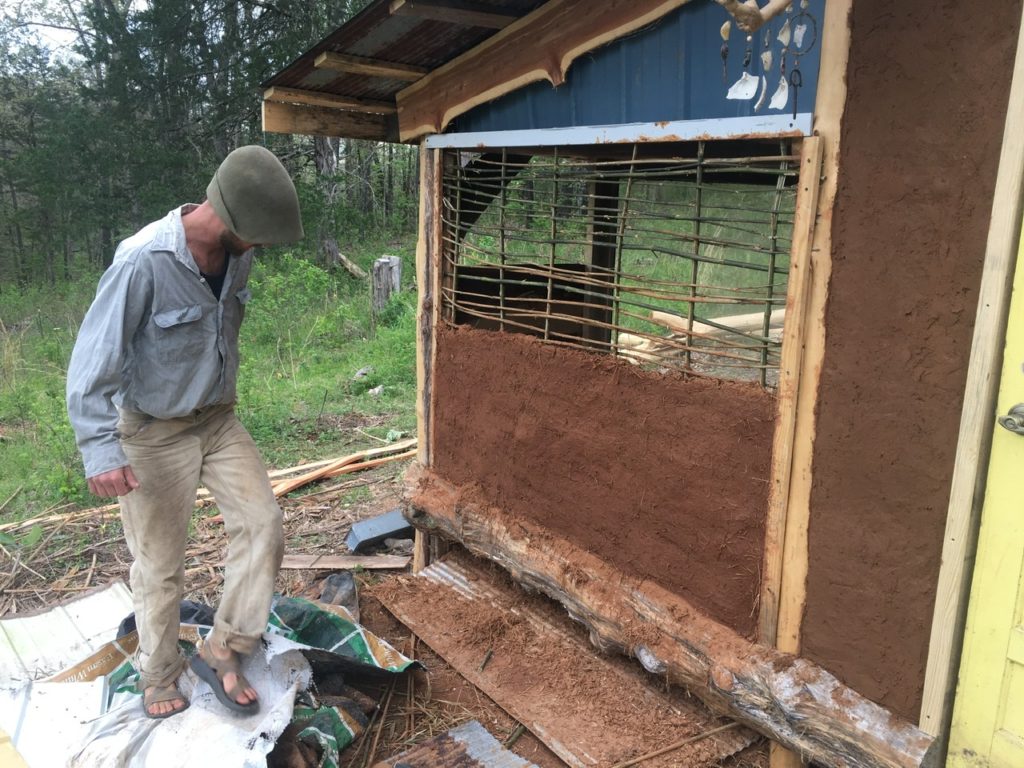
The eastern wall was easy because one large window takes up most of the wall space. The remainder was filled in with a patchwork of live edge cedar and other scraps. Moving on to the last wall, we decided to create something a little more elaborate and practice an ancient building technique known as wattle and daub. There are countless variations on this theme around the world but the concept is fairly universal: weave locally harvested stalks, poles or bamboo into a framework (a wattle) that supports a plaster (daub). In our case we are blessed with stands of river cane (Arundinarium giganteum, a native bamoo). We began by securing the river cane vertically before moving onto the horizontals. It’s sort of like weaving a basket, except the function is to provide key in for plaster.
Wattle & Daub with Bamboo & Cob
We mixed up a batch of cob-like plaster using slaked local clay, sand and straw. We made it thicker and with more fibers than we use for plasters and it really turned out great! Using a tarp for containing the mix we stomped and danced the mixture until all ingredients were married together.
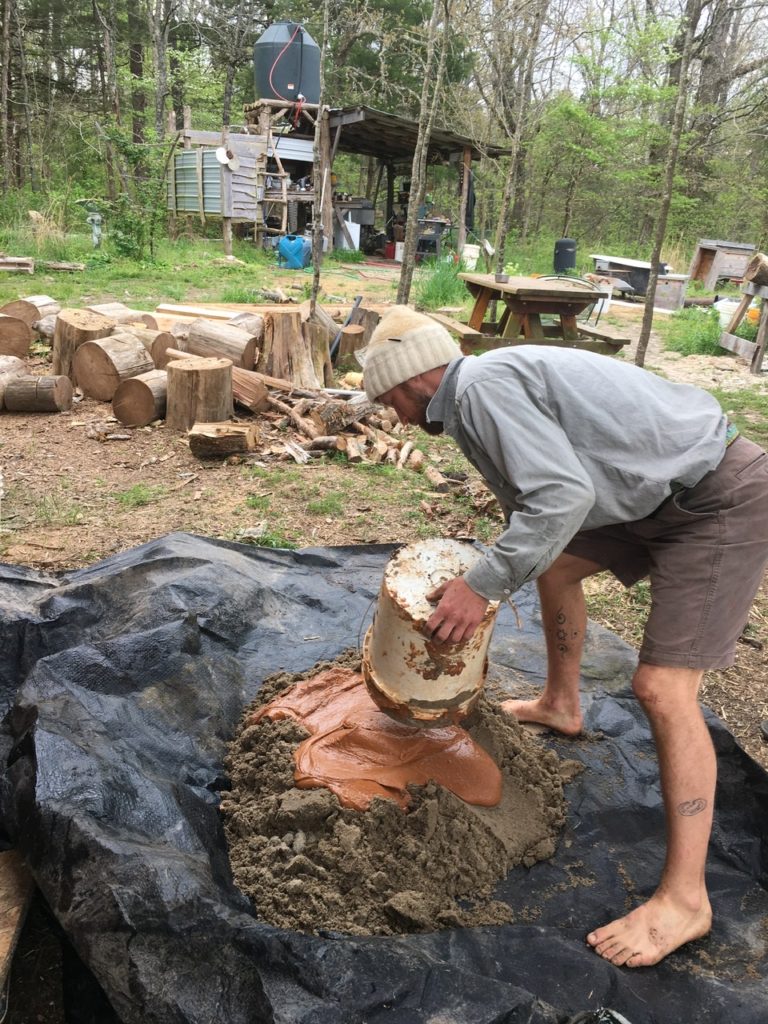
The basic principle here is to create a strong wall using sand as the bulk, clay as the binder and straw to provide tensile strength (by weaving the mass together). It took a little effort to nail down the best method for application, but we soon got into a groove and got the wall done in no time.
Using our hands was a fun shift from trowel applied plaster. By laying little bundles over the horizontals and tucking it between them, we filled the gaps and ensured good key it. Smoothing it from both sides and filling any gaps was all it took. We completed the wall over a few days to allow for the lower layers to dry a little to avoid overloading the frame. This may have been unnecessary, but since this was our first major wall using this technique, we thought it wise to air of the side of caution.
More Earthen Plaster
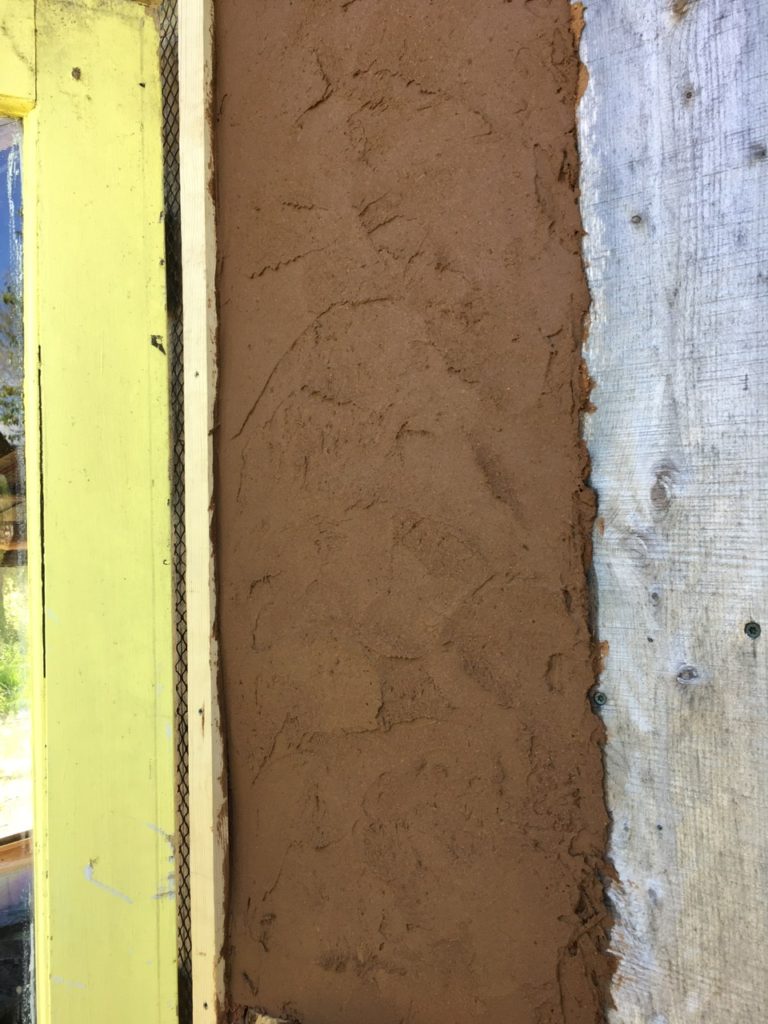
For another couple of small sections on either side of the door we trialed another wall filling technique. Using expanded metal lathe (used for keying in plaster and stucco) from the recycling center, we spanned the 12 or so inches between vertical members. Normally there would be a solid wall behind the lathe, but we thought we’d try to use it as a modern version of wattle and daub. We had to be careful not to push too hard when applying the plaster, but with some diligent work, we managed to plaster the sections quite quickly.
Yellow Door
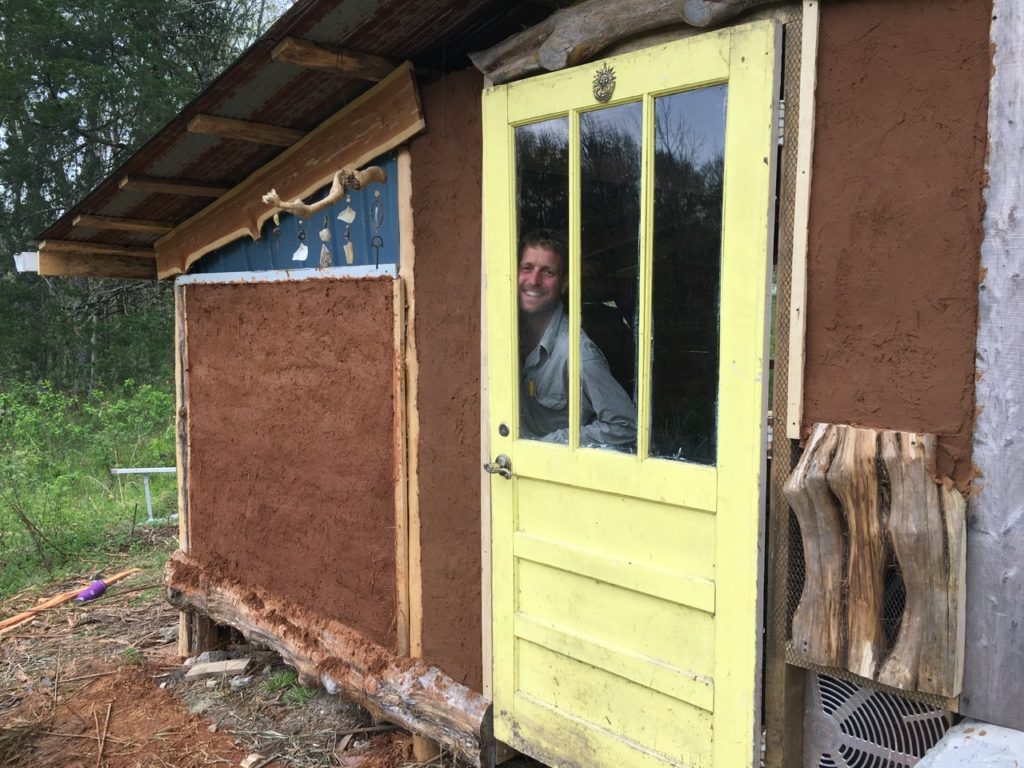
The lovely yellow door we salvaged was fun to install as we had to build a floating doorframe. Having no solid base meant we had to flex the muscles of creativity again. Securing it to the solar shed and wedging rocks beneath the 2×4 frame allowed for a relatively (it’s just a duck coop!) stable frame to hang the door from.
Finishing Touches
There still remains a few finishing touches, but the project was super fun and felt like fort building as children. We entered into the project with possibilities and fun in mind rather than super high building standards. The stakes are low and the goal of sheltering our future flock was easily achieved so we had a blast creatively using funky materials and experimenting with fusing different building materials and techniques.

We have a few more things to do before the ducks come: adding watering situation and rood catchment, sink for duck bill bathing, feeder, food storage, prepare deep bedding.
Benefits of Salvaging
Learning how to build (especially incorporating waste stream salvage) has been an amazingly empowering process for us both. Before moving here we had a little building experience, but out of necessity we have learned a lot in a few short years. If building is intimidating for you fear not! It usually involves hard work and learning new things, but the results are so rewarding.
We’ve made our fair share of mistakes and continue to do so, although we are constantly receive feedback and adapting our approach and refining our techniques. There are many grassroots and appropriate methods of building that are practiced the world round by individuals and families– not the expert-centric situation we have in much of the developed world. No one can build your building better than you can!